Deploy an app
Run a container image as an app in your project.
This page runs the public nginx:1.27 image, a web server that answers on
port 80. Use your own image the same way.
Create the app
On the project canvas, select Custom App in the sidebar. The Custom Image dialog opens.
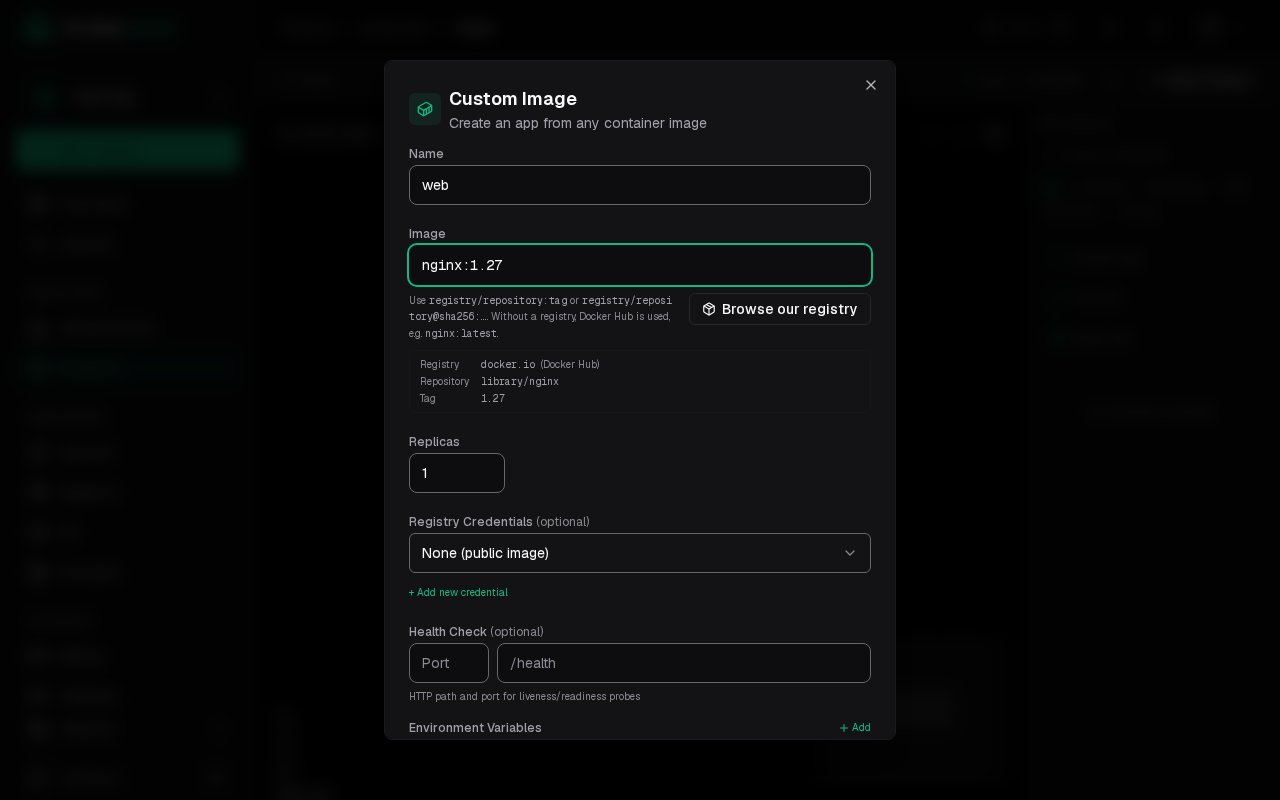
Enter web as the Name and nginx:1.27 as the Image. Leave
Replicas at 1.
Under Health Check, enter port 80 and path /. The port is also
the port the app receives traffic on.
Select Create & Deploy. Create saves the app without starting it.
Check that it runs
Open the app on the canvas and go to its Deploys tab. The deploy moves
through pending and deploying and ends as succeeded. The Logs tab
shows nginx's start-up lines.
If the deploy fails, the Logs tab usually says why: an image name that does not exist, a private image without Registry Credentials, or an app that does not answer on the health check port.
The fields
- Name: the app's name in the project.
- Image:
registry/repository:tagorregistry/repository@sha256:.... Without a registry, Docker Hub is used, songinx:1.27isdocker.io/library/nginx:1.27. Browse our registry picks an image from your organization's registry. - Replicas: how many copies run.
- Registry Credentials (optional): for private images.
- Health Check (optional): the HTTP port and path used for liveness and readiness probes.
- Environment Variables: values passed to the container.
To build from a repository instead of running an image, see Deploy an app from GitHub.
Next: add a domain to open the app in a browser.